
Many people struggle with standing desks that don’t fit their body or workspace, leading to discomfort, poor posture, and wasted money on desks that don’t work. Making your own DIY standing desk frame solves these problems by giving you a perfect fit, tailored features, and the quality you need to create a comfortable, productive workspace that lasts. How exactly do you create your own standing desk?
Key Takeaways:
- Create your DIY standing desk frame by measuring your ideal heights and adjusting the frame and accessories to fit your space and comfort.
- Accurate measurements, proper planning, and selecting the right components are critical to a successful build.
- Enhancing your desk with cable management, ergonomic accessories, and a quality finish boosts both function and comfort.
In this article, you’ll learn exactly how to design and build a standing desk frame that meets your unique needs step-by-step.
Why Create Your Own Standing Desk Frame
Everyone’s body is different. The height that’s perfect for someone else might leave you slouching or straining. By making a DIY standing desk frame, you avoid those painful compromises. Plus, it may help boost productivity, too.
A DIY Standing Desk is also ideal when your space is awkward. A commercial desk may not be suitable when you have sloped walls, tight corners, and unusual angles. When you build your own, you get exactly what works, whether you want extra depth, built‑in storage, or a unique shape.
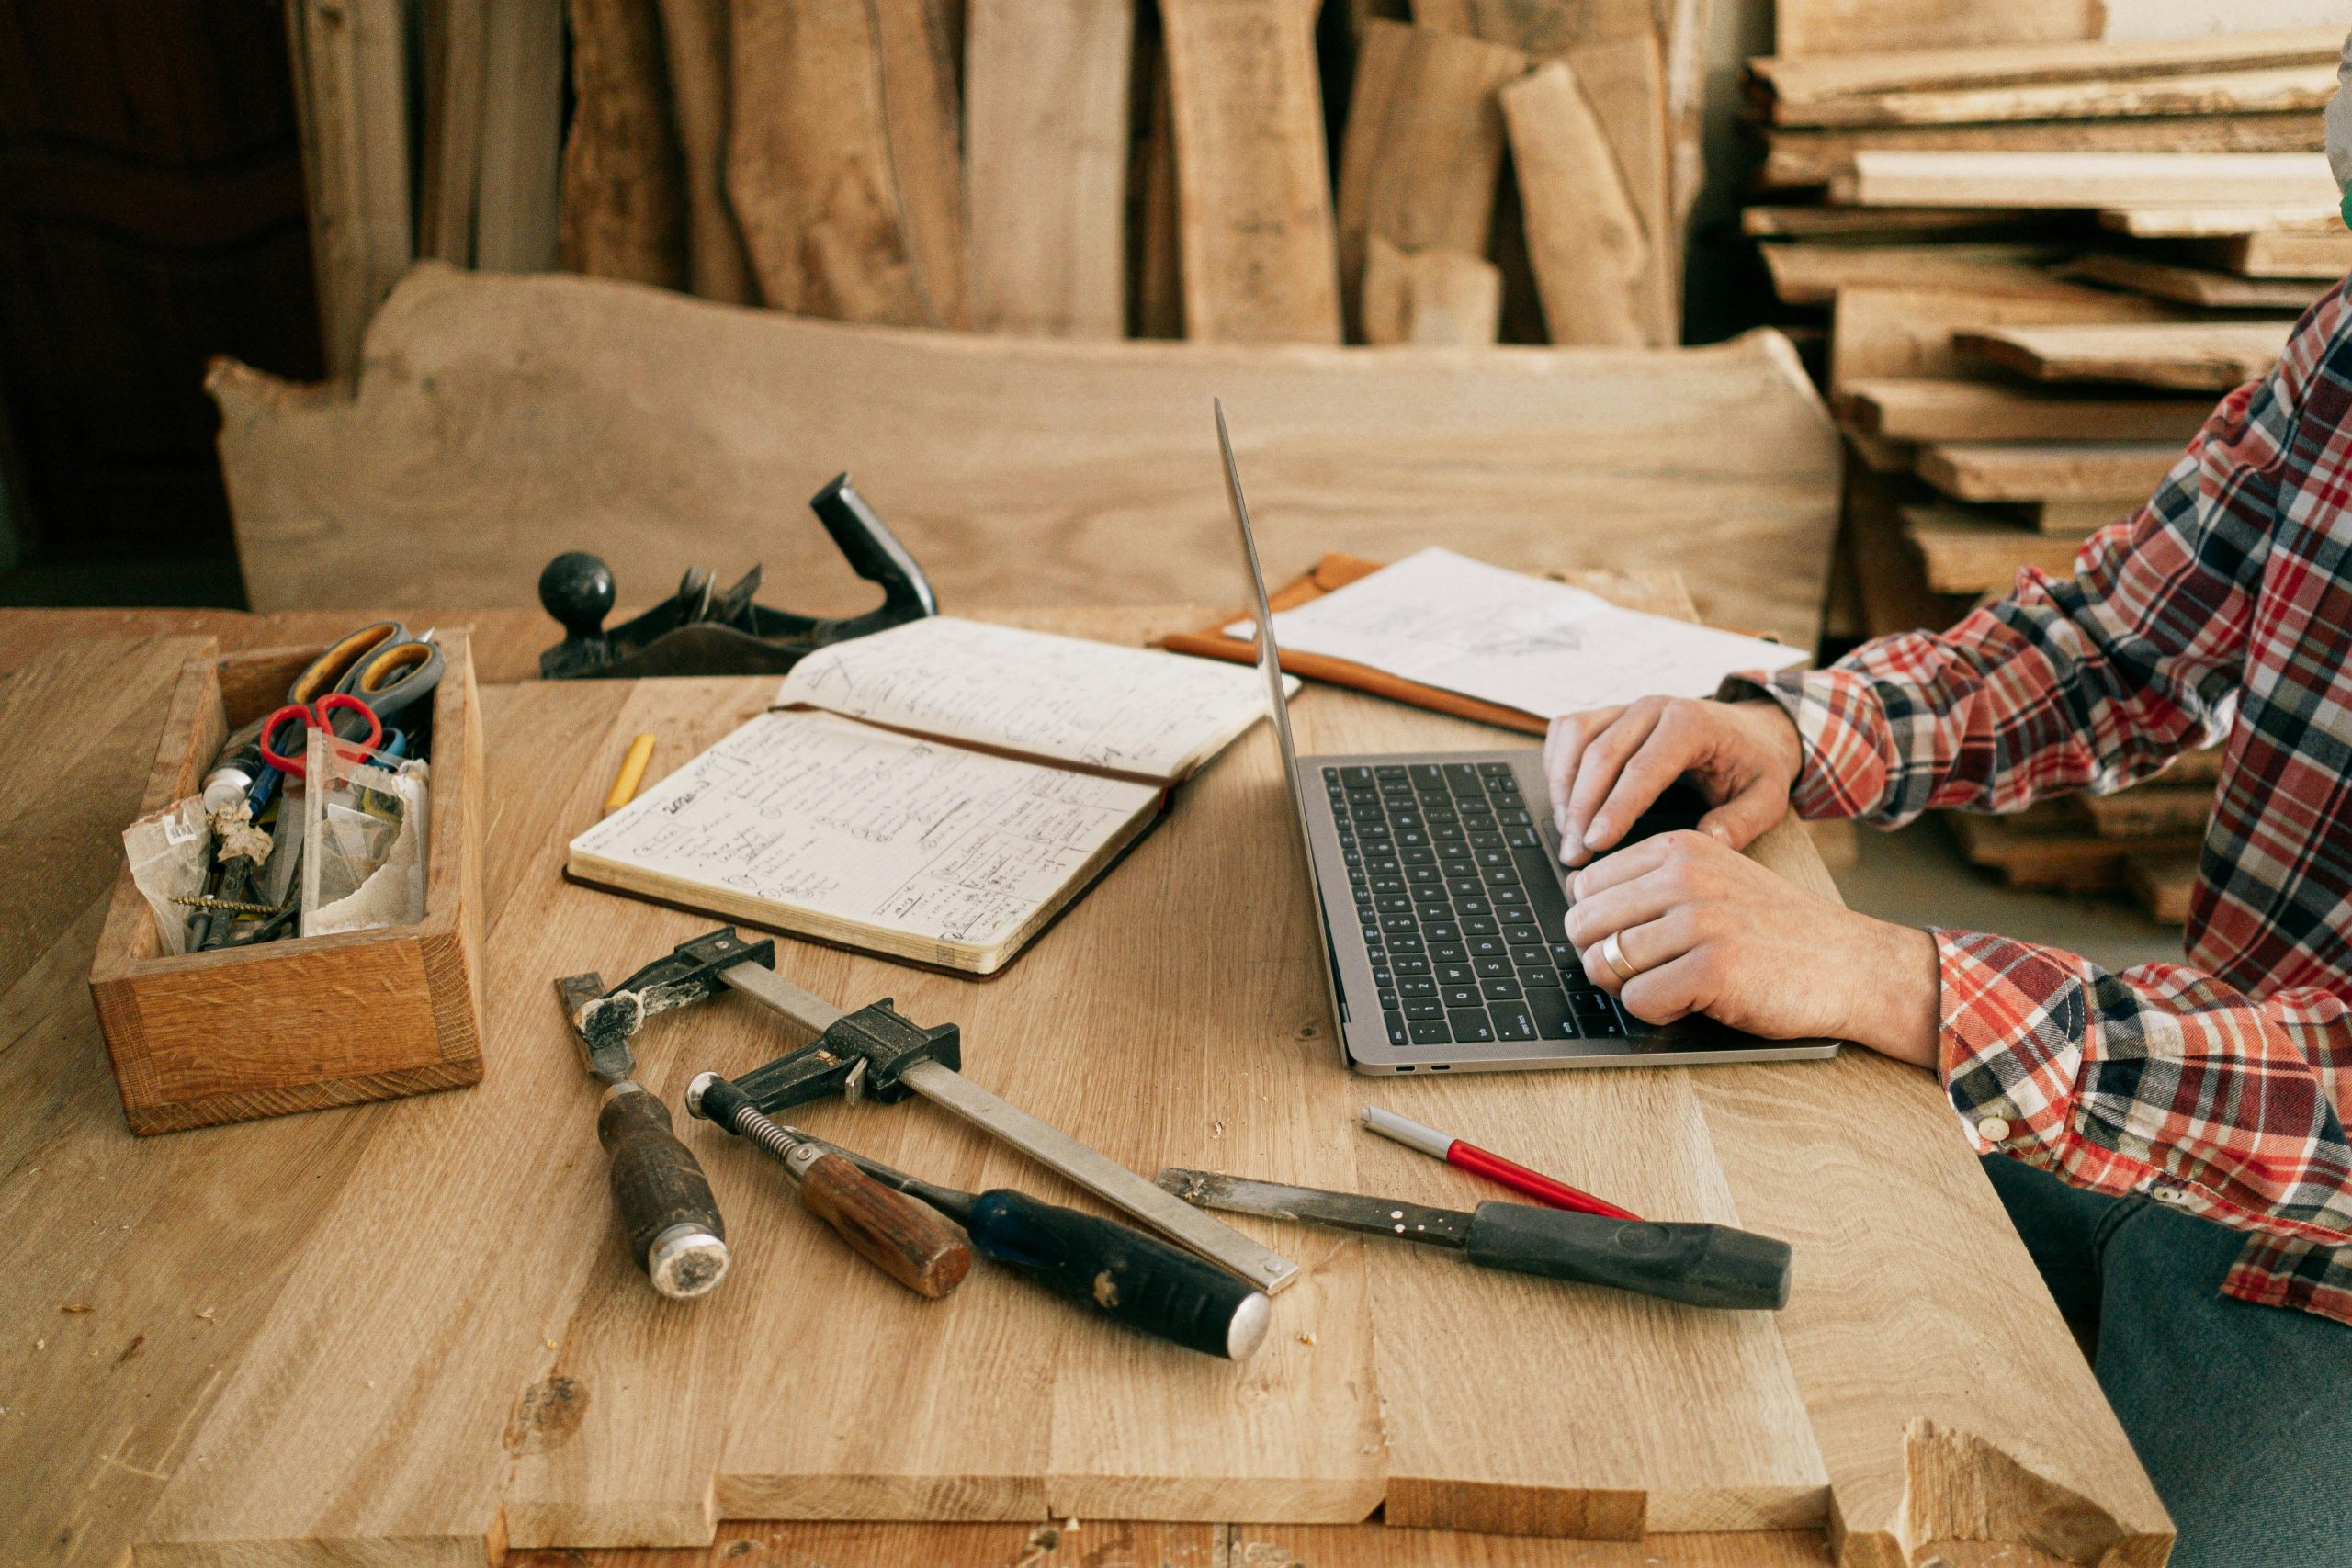
What You’ll Need (Tools & Materials)
Here’s your checklist:
Tools:
- Tape measure
- Power drill + drill bits
- Saw (circular, table, or jigsaw)
- Screwdrivers
- Level
- Safety gear (goggles, gloves, etc.)
Materials:
- A frame kit (manual crank or electric) compatible with adjustment
- Desktop wood (plywood, butcher block, reclaimed wood)
- Screws, brackets, fasteners
- Wood finish, stain, or paint
- Optional extras: casters, cable tray, monitor arm, grommets
If you grab a good‑quality frame kit that supports adjustability, you’ll spend less time customizing the basics and more time personalizing.
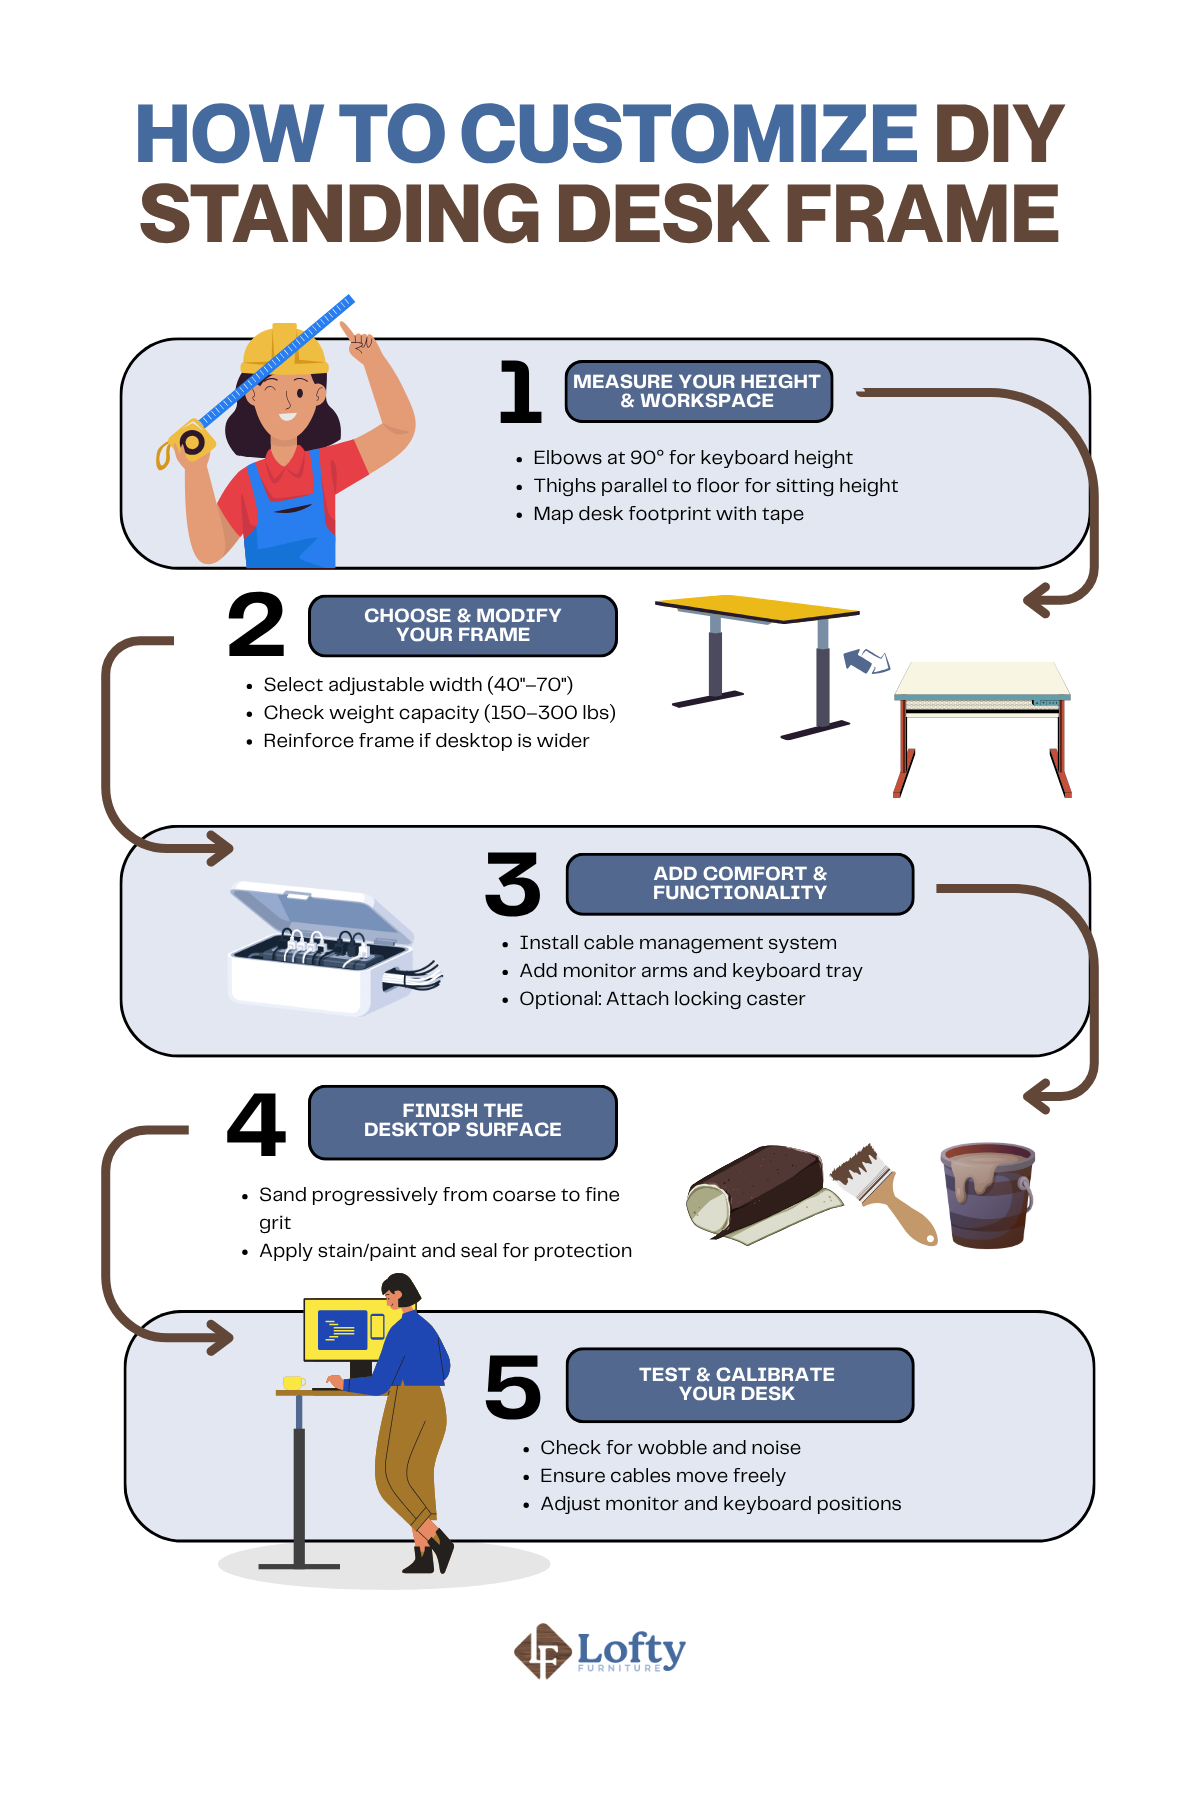
Step 1: Find Your Ideal Desk Height and Size
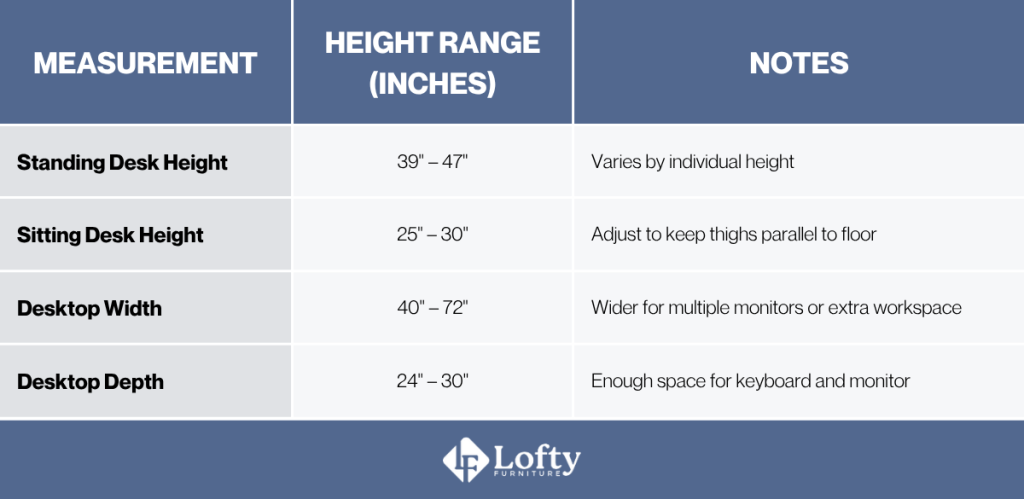
Stand up straight with your elbows at a 90° angle — that’s where your keyboard should go when standing. When sitting, keep your thighs parallel to the floor and your feet flat. Stack books or boxes to test different heights until both positions feel comfortable. Measure and write down your ideal sitting and standing desk heights.
Typical heights: Sitting: 25″–30″, Standing: 39″–47″.
For size, most desktops are 40″–72″ wide and 24″–30″ deep. Use tape to mark out the size on your floor and check for space behind the desk and for cable access.
Below are typical ergonomic height ranges for reference:

To better understand your options, learn more about the different types of standing desks and how each one fits different workstyles and setups.
Step 2: Pick and Adjust Your Desk Frame
Pick a frame that fits your desk width (usually 40″–70″) and supports the weight you need (150–300 lbs). If your desktop is wider than the frame, you may need to add extra support. Place the desktop upside down, center the frame, mark the holes, then drill and screw it in. Make sure it’s straight and aligned.
Take your DIY standing desk to the next level with Amish Adjustable Desks—durable, customizable, and built to fit your needs.
Step 3: Add Features for Comfort and Function
Use a cable tray under the desk and clips or ties on the legs to keep cords neat and out of the way. Add monitor arms and a keyboard tray to improve ergonomics and free up desk space. If you want to move your desk, add locking wheels (casters) rated for your desk’s weight. Drill holes for power grommets or charging stations to keep cords tidy and accessible.
Step 4: Finish Your Desktop Surface
Sand the desktop with coarse sandpaper (around 120 grit), then finish with finer grit (220) for smoothness. Wipe away dust. Apply your chosen stain or paint in even coats, testing first on scrap wood. Let each coat dry before adding more. Seal the surface with polyurethane, varnish, or wax to protect it. Let everything dry completely before using the desk.
Step 5: Test and Adjust Your Desk
Raise and lower the desk a few times. Watch for any wobbling or unusual sounds. Make sure cables have enough slack and don’t snag. Adjust your monitor and keyboard so they’re comfortable in both sitting and standing positions. Tighten any loose parts.
Common Mistakes to Avoid With DIY Standing Desk Frames
Even with the best intentions, a DIY project can fall short if key details are overlooked. When building a DIY standing desk frame, precision and planning are just as important as the materials you use. To help you avoid frustration (and costly do-overs), here are some of the most common mistakes—and how to prevent them.
Inaccurate Measurements
Incorrect desk height or desktop size can lead to serious ergonomic issues like back, neck, or wrist strain. It’s essential to measure your body dimensions and workspace before committing to cuts or materials. Simulate the desk height in both sitting and standing positions to ensure a proper fit.
Exceeding Frame Weight Limits
Each DIY standing desk frame is rated for a specific weight range, and exceeding it can cause structural damage or motor failure. Heavy desktops, multiple monitors, and accessories quickly add up. Always check the frame specifications and stay below the maximum capacity for safe, long-term use.
Poor Cable Planning
Cables that are too short or improperly routed can become strained or disconnected when the desk moves. This not only causes functionality issues but can also lead to damage over time. Plan for enough slack and secure cables using trays, clips, or cable sleeves.
Neglecting Ergonomic Testing
Even a well-built desk can cause discomfort if it’s not properly adjusted for your posture. Spend time testing your setup to fine-tune monitor height, desk direction, keyboard placement, and wrist alignment. Prioritizing ergonomics ensures a workspace that supports both comfort and productivity.
Conclusion
Building a custom DIY standing desk frame isn’t just a rewarding project; it’s an opportunity to create a workspace that fits your body, your workflow, and your environment perfectly. By taking the time to measure accurately, select the right components, and tailor each element to your specific needs, you ensure better ergonomics, greater comfort, and long-term functionality.
Whether you’re working in a compact corner or designing a full-scale studio setup, the ability to adapt your desk frame gives you the flexibility most commercial options can’t match. With careful planning and attention to detail, your DIY desk won’t just look good; it’ll support your health, productivity, and daily routine for years to come.
Frequently Asked Questions
Is it cheaper to build your own standing desk?
Yes, building your own standing desk is typically cheaper than buying a pre-made one, especially if you already have some woodworking tools. You can control costs by choosing affordable materials and skipping premium features you don’t need.
What is the cheapest wood to build a desk?
Pine is one of the cheapest and most accessible woods for building a desk. It’s lightweight, easy to work with, and can be stained or painted to match your style.
How long does it take to build a standing desk?
Most DIY wood standing desks can be built in a day or over a weekend, depending on the complexity of the design and your experience level. Time can vary based on whether you need to cut wood, apply finishes, or install motorized components.
Is plywood good for a desk?
Yes, plywood is a strong and budget-friendly option for desk surfaces, especially if you choose a higher-grade finish like birch or maple. It’s durable, easy to cut, and can be sanded, painted, or stained for a clean look.